How to Create a Gravatar
The following set of instructions will describe the steps necessary for creating an account on http://en.gravatar.com/, which will allow you to create a Gravatar. A Gravatar is a globally-recognized avatar that will appear next to your name when you comment or post on a blog or web forum, including Women Writers, Women Books.
Gravatar Homepage (Step 1): Go to http://en.gravatar.com/. Click Get Your Gravatar, located in the middle of the homepage (Figure 1).
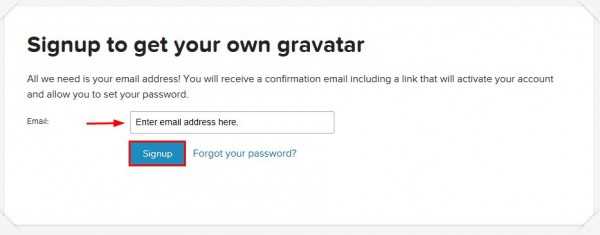
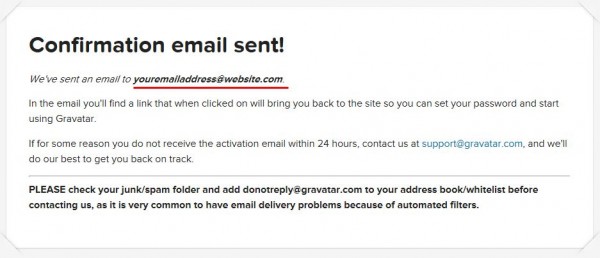
Signup for a Gravatar Account (Step 2): Enter your email address in the space provided (Figure 2). Then click Signup. This takes you to a confirmation page (Figure 2.1). A confirmation email will be sent to you within 24 hours which includes a link to activate your account, choose your username, and set your password.
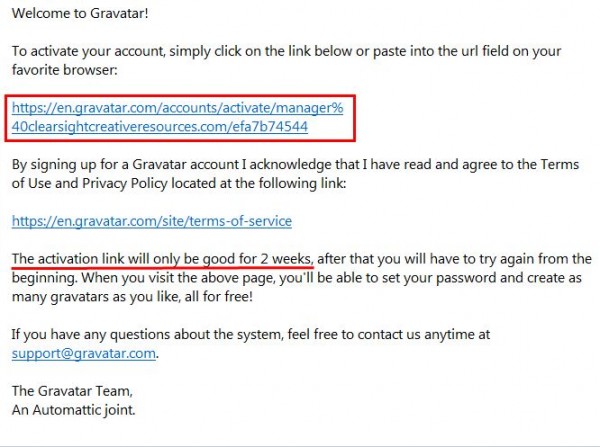
Confirmation Email (Step 3): Once you receive the confirmation email, click the link provided or paste it into the URL field on your browser. Note that this activation link is only valid for two weeks; if you wait longer than two weeks to complete the activation of your account, you will have to start over and sign up again.
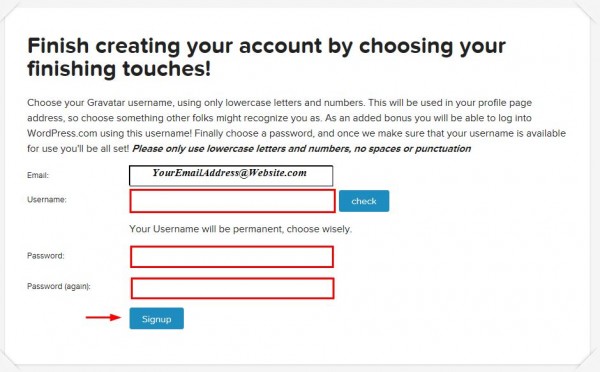
Choose Your Username and Password (Step 4): After clicking the activation link in your confirmation email, you are taken to the Gravatar site. Choose a Gravatar username that consists only of lowercase letters and numbers. Enter it into the box next to the word “username.” Next, choose a password and enter it into the boxes next to the words “password” and “password (again).” When you are finished, click Signup, noted by a red arrow in Figure 4.
Manage Your Gravatar (Step 5): Once you have created your Gravatar account, you have the option to add a second email address or to upload a photo that will appear next to all of your posts on a blog or web forum.
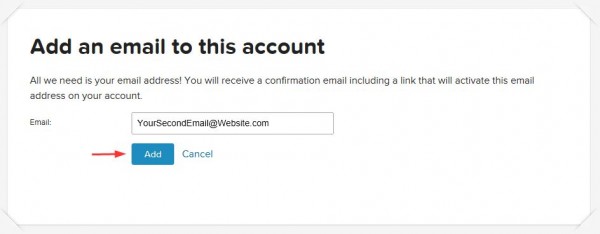
- To add an additional email address, click Add a New Email underneath the “Manage Gravatars” heading (Figure 5). This takes you to another page, where you can enter your second email into the space provided and then click Add (Figure 5.1). Another confirmation email will be sent to this address, and you can repeat steps 3 and 4 to activate it.
- To upload a photo, click Add One By Clicking Here, located below the blue area in the middle of the page (Figure 5). This takes you to a new page where you can upload an image (see step 6).
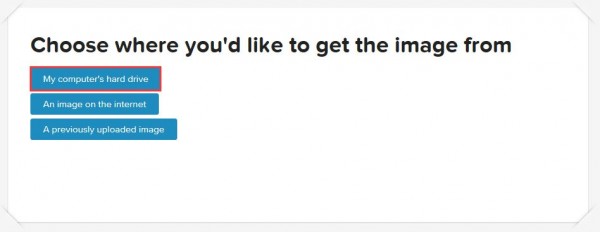
Uploading an Image (Step 6): When uploading an image, you can either use a previously uploaded image, an image that has been posted somewhere on the Internet, or an image from your computer’s hard drive. For this example, we are using an image from the computer’s hard drive. To do this, click My Computer’s Hard Drive under the heading asking where you would like to get the image from (Figure 6). This takes you to a new page where you can browse for your photo.
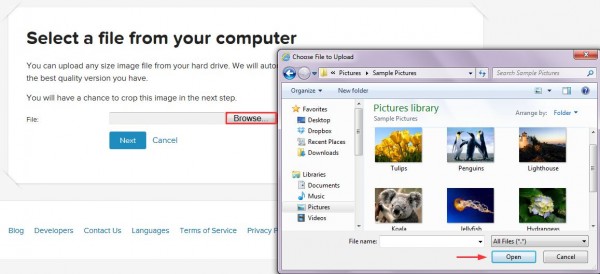
Selecting Your Image (Step 7): Click Browse. This opens a new window where you can select your photo. When you have the file selected, click Open (Figure 7). The pop-up window will disappear. Click Next (noted by a red arrow in Figure 7.1).
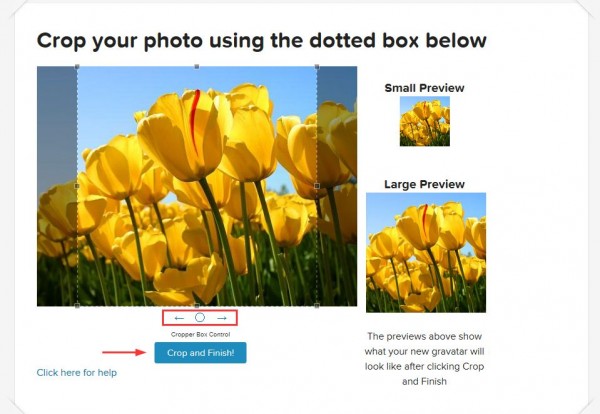
Cropping Your Image (Step 8 ): To crop your photo, use the crop box controls underneath the image (Figure 8). The left and right arrows will move the cropped area left and right, and the circle will move it into the center. On the right side of the page, there are two preview windows so you can see what your finished image will look like in a small and large form. When you are satisfied, click Crop and Finish (Figure 8).
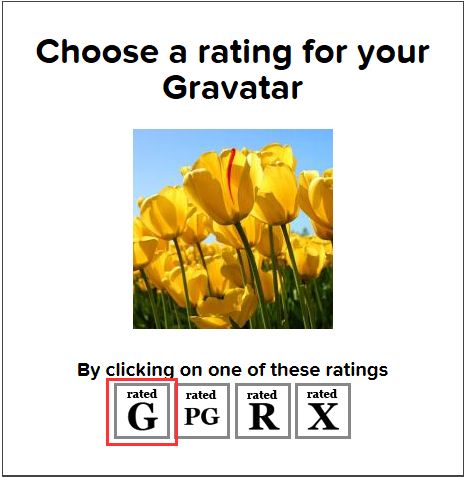
Choosing a Rating For Your Image (Step 9): Choose a rating for your image by clicking on the appropriate box: G, PG, R, or X. The G-rated image type is suitable for all sites and all audiences. PG-rated images contain things such as lesser swear words or mild violence. R-rated images display hard drug use, harsh profanity, or nudity. Images that are rated X contain strong sexual imagery or violence. The photo used in this example is appropriate for all sites and audiences, so the G rating is used (Figure 9).
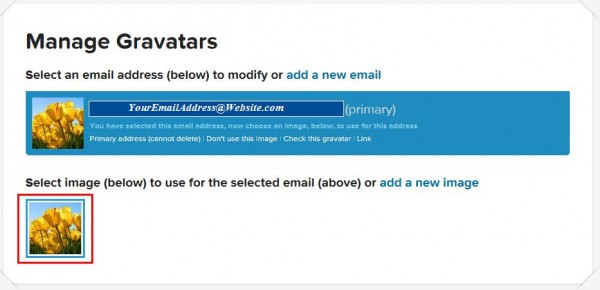
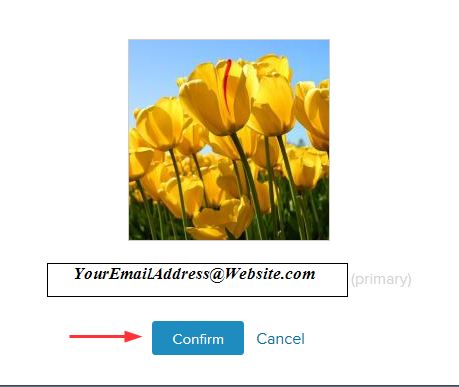
Attaching Your Image to Your Account (Step 10): After choosing the rating for your image, attach it to your Gravatar account by clicking on it. If you have only uploaded one image, that will be the only one available to click (noted by a red box in Figure 10). However, if you have uploaded more than one image, make sure to choose the one that you want to attach to the email address that is listed on this page. When you click the image, a confirmation box will appear. Click Confirm (Figure 10.1). Your Gravatar image will now appear next to all of your comments and posts on blog sites and web forums where you are using this email address.
—
Victoria Shockley is the Assistant Editor for Women Writers, Women Books, as well as a freelance writer and editor. She’s currently in her sophomore year at North Carolina State University in Raleigh and is majoring in English with a concentration in language and writing.
Visit Victoria’s website at http://victoriashockleywrites.wordpress.com/.
Follow Victoria on Twitter: @Victoria_Writes.
Connect with Victoria on LinkedIn or visit her Women Writers, Women Books author page.
Category: Blogging, How To and Tips, US American Women Writers, Women Writing Non-Fiction
Comments (3)
Trackback URL | Comments RSS Feed
Sites That Link to this Post
- Welcome! « | September 15, 2012




Hi Victoria 🙂 Great set of instructions for creating a Gravatar. Anora from Women Writers, Women Books first put me onto the globally-recognized avatar and it has been great. 🙂 Great post!
Thank you, Vacen! I’m glad you liked the post. It was my second how-to article for WWWB. 🙂