
How to Create a Post in WordPress
The following set of instructions are directed towards contributors wishing to create a new post on a website using WordPress. The following steps will describe how to upload text, insert photos into the post, choose categories, add tags, and then submit the finished article for review.
Accessing the Dashboard (Step 1): First, log into your WordPress account by going to www.booksbywomen.org/wp-admin and typing in your username and password. After you have logged in, hover over your name in the top left corner and select Dashboard from the dropdown menu (Figure 1). This will take you to a new page, where you will have the option to add a new post to the site.

Figure 1
Adding a New Post (Step 2): On the left sidebar, there is a heading labeled “Posts.” Click Add New under this heading to upload a new post (Figure 2). This takes you to a different area of the Dashboard, where you are able to upload your text. If the Add New button is not listed, click the down arrow at the right corner of the “Posts” heading. This displays the dropdown menu that you see in Figure 2.
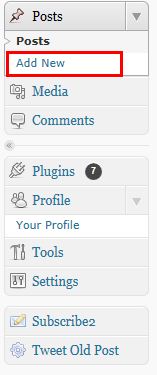
Figure 2
Adding a Title to Your Post (Step 3): Add a title to your post by typing it into the empty bar right below the heading “Add New Post” (Figure 3). You must manually type in your title; if you try to copy and paste it from another document, it may not show up.
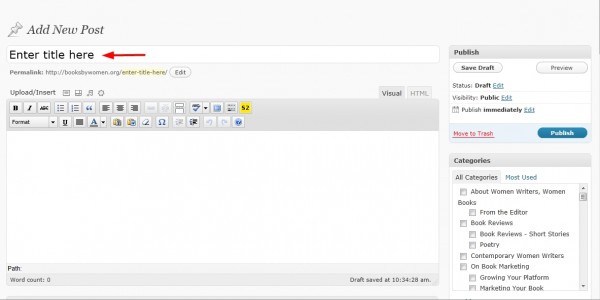
Figure 3
Uploading Text (Step 4): To preserve formatting in your text, such as italics, bolded phrases, or links, click the small button labeled with the Microsoft Word logo. This button is located in the middle of the second row of buttons on your menu bar, below where you entered your title. It is noted by a red box (see Figure 4). When a new window appears, use the keyboard shortcut “CTRL + V” to paste your entire document into the space provided (Figure 4.1). Please note that this is for text only; pictures will be added later. When you are finished, click Insert in the bottom right corner of the window.

Figure 4
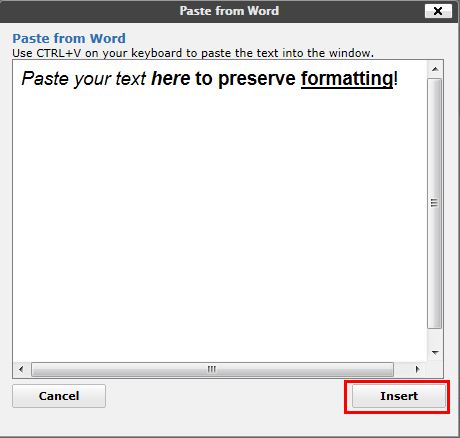
Figure 4.1
Inserting a Photo (Step 5): Before adding an image, always make sure that it is titled appropriately. For example, an author photo would be titled with the author’s name. This ensures that your photo will show up in a Google search for that phrase or title, which brings more traffic to your site.
- When you have appropriately titled your image, click the small photo icon that is next to the heading “Upload/Insert,” located right above the two rows of buttons on your dashboard (Figure 5). A new window will appear which allows you to add an image from your computer.
- Click Select Files, noted by a red box in Figure 5.1. This will bring up a pop-up window where you can select the file to be uploaded.
- When you have your image selected, click the Open button located in the bottom right corner of the window (Figure 5.1). You can repeat this process for subsequent photos; we recommend uploading them one at a time.

Figure 5
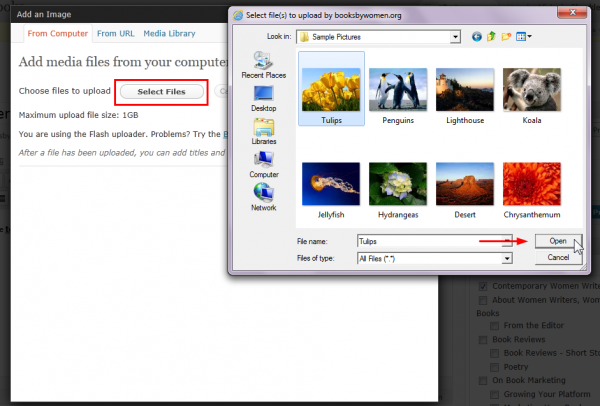
Figure 5.1
Modifying an Image (Step 6): After you have uploaded an image, you will need to set the alignment, choose the image size, and write a caption (if desired).
- To set the alignment of your photo (center, left, right, or none) click the radio button next to the appropriate setting. Generally if there are multiple photos in a post, we recommend that the alignment alternates with each one. For example, the first picture would be on the right side, while the second photo is aligned to the left.
- To select a size for your image, click the radio button next to the appropriate size choice. You can also choose to set this image as the featured photo for this post, if desired. If you are only adding one picture, you will want to set that picture as your featured image.
- The final step is to add a caption; we recommend waiting until you have finished all other changes to the image before doing this to ensure that the caption is not accidentally erased in the course of other alterations. To add a caption, simply type your text into the box labeled “Caption” (Figure 6) and it will automatically appear underneath your photo when you preview your post. When you are finished modifying your image, click Insert into Post, noted by a red arrow in Figure 6.
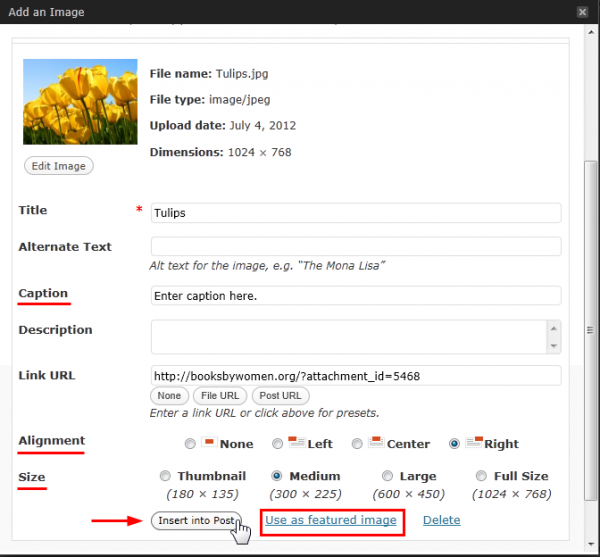
Figure 6
Categories and Tags (Step 7): After uploading your text and photos, the next step is to choose the categories for your post, and to add appropriate tags.
- To choose the categories, go to the “Categories” menu on the right side of the page and check the box next to each category in which you want this post to be included (Figure 7).
- To add tags to your post, go to the “Post Tags” menu right below the “Categories” menu on the right side of the page, and enter the tags that are related to the topics discussed in your article (Figure 7). For example, an article on a female author from Australia who enjoys gardening might have the tags “Australian woman writer,” “Australian author who gardens,” and “authors who enjoy gardening.” You can enter all of your tags at once, separated by a comma, or you can add each tag individually by typing it into the box and then clicking Add. The “Enter” key on your keyboard works for this as well.
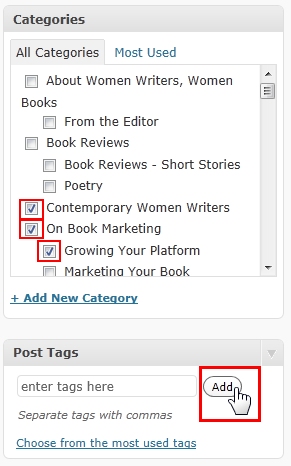
Figure 7
Editing Uploaded Images ( Step 8 ): After selecting the categories and adding tags, carefully read over your post. If you need to make changes to the text, add or delete images, or edit your already-uploaded photos, you can easily do this now.
- To add an image, repeat steps 5 and 6.
- To delete or edit a photo, click on the photo, and two buttons will appear in the top left corner (Figure 8). The one labeled with a small landscape scene will allow you to edit the size and caption of the photo, while the button labeled with the red circle-backslash symbol will delete the photo when clicked. Be careful to click the correct one; if you delete a photo, you will need to insert it again.
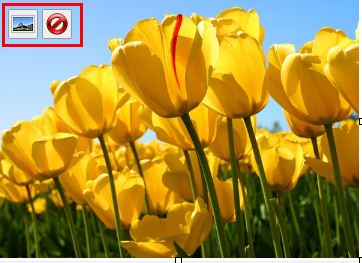
Figure 8
Preview and Submit (Step 9): The final steps to uploading your post to WordPress are to preview and then submit for review.
- To preview how your post will look on your website, click Preview on the top right side of the page, located under the “Publish” menu (Figure 9). This option is useful to ensure that everything is correct and in place on your post before your readers see it.
- When you are satisfied with your post, click Submit for Review, which is also located under the “Publish” menu on the right side of the page. Your post will immediately be sent to the editor, who will be able to approve and then publish it.
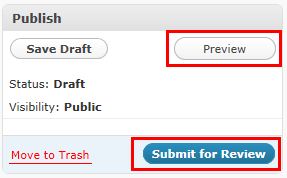
Figure 9
—
Victoria Shockley is the Assistant Editor for Women Writers, Women Books, as well as a freelance writer and editor. She’s currently in her sophomore year at North Carolina State University in Raleigh and is majoring in English with a concentration in language and writing.
Visit Victoria’s website at http://victoriashockleywrites.wordpress.com/.
Follow Victoria on Twitter: @Victoria_Writes.
Connect with Victoria on LinkedIn or visit her Women Writers, Women Books author page.
Category: Blogging, Contemporary Women Writers, How To and Tips, Women's Books and Writings
Subscribe
If you enjoyed this article, subscribe to receive more just like it.


Comments (1)
Trackback URL | Comments RSS Feed
Sites That Link to this Post